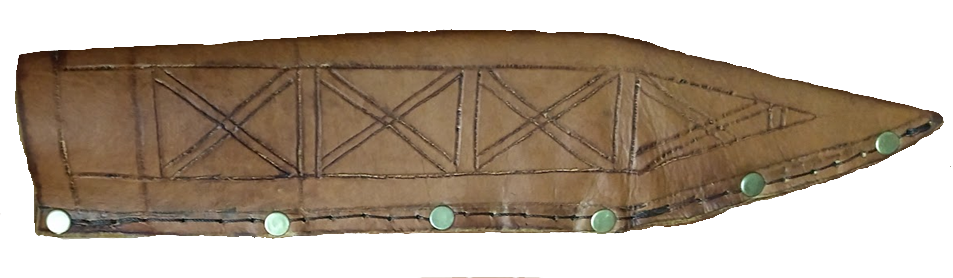
Anglo-Saxon Seax Sheath
Displayed at Ice Castles, Barony of Black Diamond, 19 Jan 2019
Project: Anglo-Saxon Seax Sheath
Artisan: Lady Þóra (Thóra) Hrafnsdóttir
Historical Basis:
Based on a Anglo-Saxon Seax Sheath found in Coppergate / York, England, dated to 900-1000 C.E.
Materials: leather, water, waxed linen thread, modern rivets, rubber cement
Techniques: water forming, tooling of wet leather, leather stitching.
Tools: Modern awl and stamping tool, water, rubber mallet, steel sewing needle.
Dimensions:
Seax: 14"L total; 9”Lx2”W blade, 4.75” handle
Sheath: 13.25” Long, 3m” Wide
This is a commission piece intended for regular, possibly heavy use. I chose sheath 15661 to use as my model. Some details have been modified to suit the user, while aiming to maintain a period appearance.
I used 7.5oz leather, which is the same 3mm thickness mentioned in the source material. The color was chosen to resemble leather aged with use, rather than dyed, and cut to the size of the seax it is for. It was then dampened and stretched around the seax, which I had already wrapped to protect it. Clamps held it in place after I worked with it and while the leather dried into the desired shape. The clamps left impressions on the damp leather, which I was able to work into the designs.
The designs are based heavily upon the model. The tooling design was not measured to match the original, but rather was sketched out on paper to reflect the original and yet remain roughly in scale with the new item. The design was then recreated on the dampened leather, with the sketch used as a guide. They were applied first with a dull awl, drawn along the leather with pressure applied to create a deep line. A dull awl was used in order to minimize cutting the surface of the leather. A smooth-surface tooling stamp was then used to deepen and darken the marking.
I have added a small piece of leather to the interior, at the tip of the sheath. The seax has an angled transition between the back section of the blade and the point that seems to be different from most of the period examples1 that I have seen. The additional leather has been cut to fill the space between the edge of the seax and the end of the sheath. It has been attached along the edge closure, as well as being glued to the sides with rubber cement. This was done to insure the blade could not slide past it on either side.
- Showing the angled transition between the back section of the blade and the point, and how it differs from the angle of the sheath. The unfilled area is where the additional leather was added.

-
Silhouette of the find from Sittingbourne, Britain for comparison.

-
And both, with the find overlaid in yellow against the seax and sheath. It illustrates the differences in blade angle nicely. (Not to scale)

Extant sheaths were closed with rivets, and sometimes also with
tunnel stitch, which is beyond my current skill level. I have used rivets and
saddle stitch, which is similar in appearance and technique to tunnel stitch. Both stitches are very durable.
The belt loops are at the length requested by the owner, and attached directly to the sheath with rivets and sewing. It is unclear if metal edgings were used on the original. I have chosen not to use them on this piece, as I do not have the supplies or skills available at this time.
Illustrations of source:
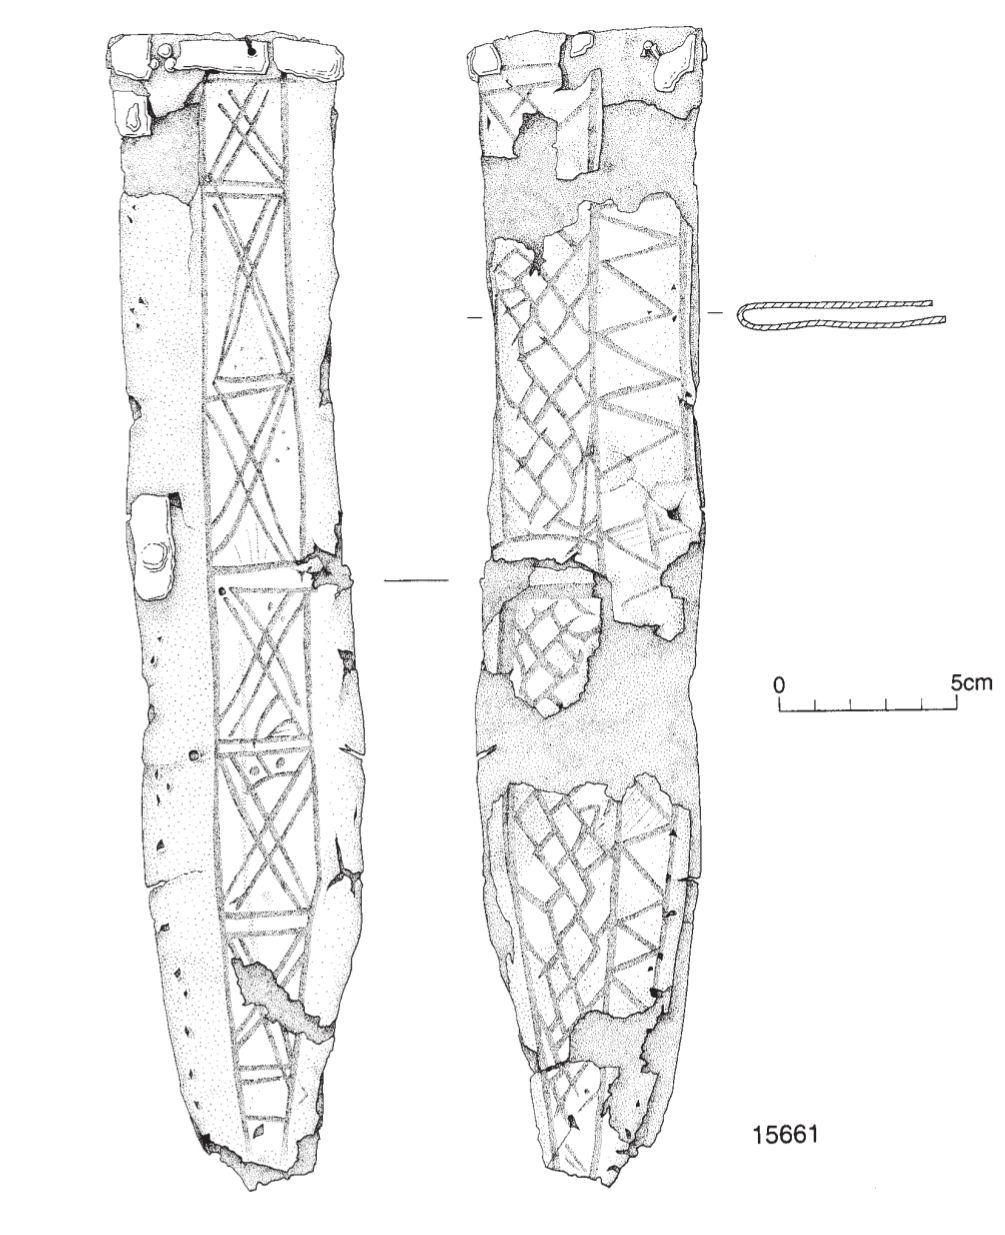
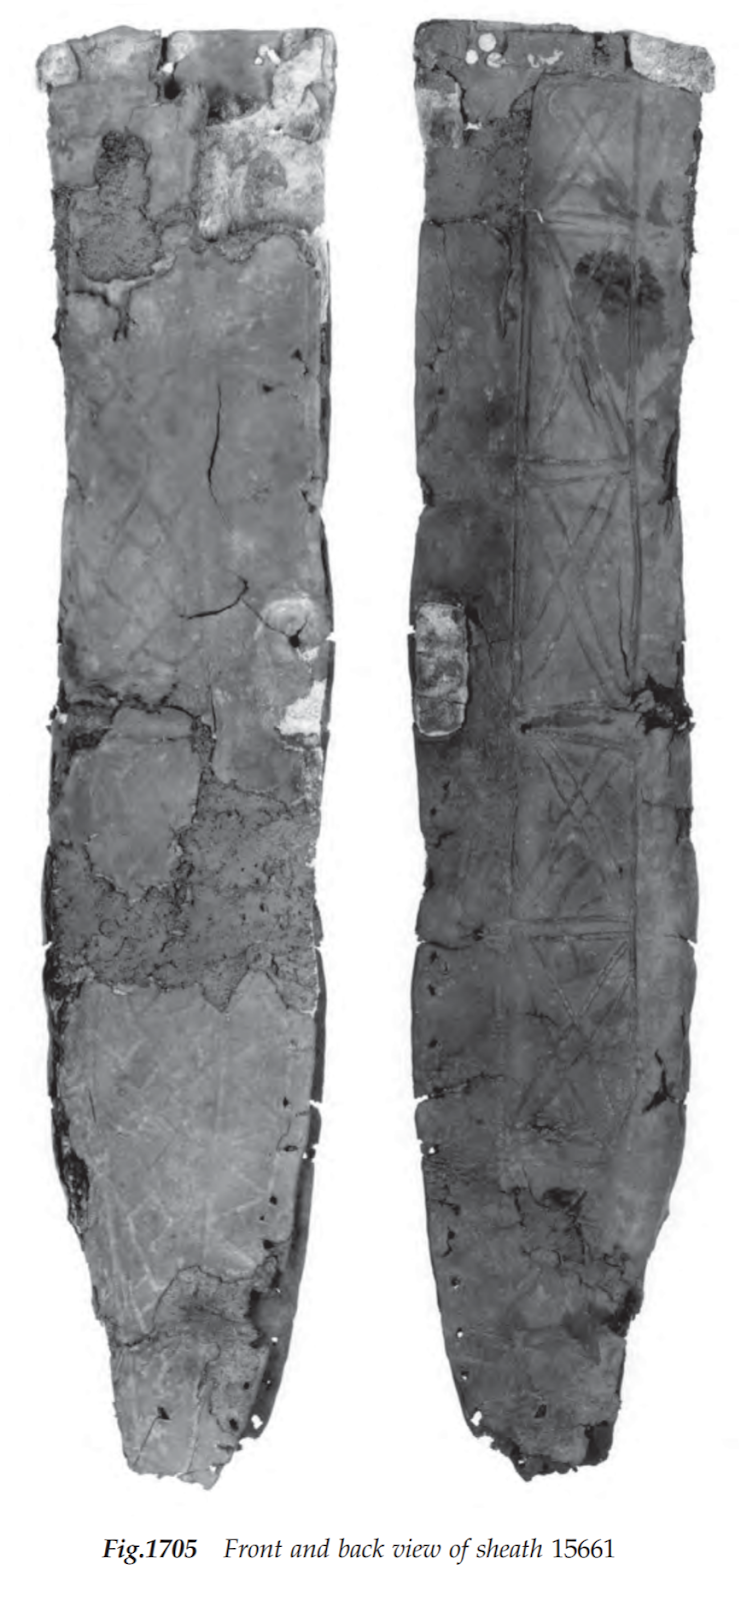
#15661, Group 1, Pg 3382:
Pg. 3383
Iron Seax, British Museum. Object 1881,0623.1. Early 10th Century, found near Sittingbourne, in SE England.
Leather and Leatherworking in Anglo-Scandinavian and Medieval York, © 2003, pp 3377-3385